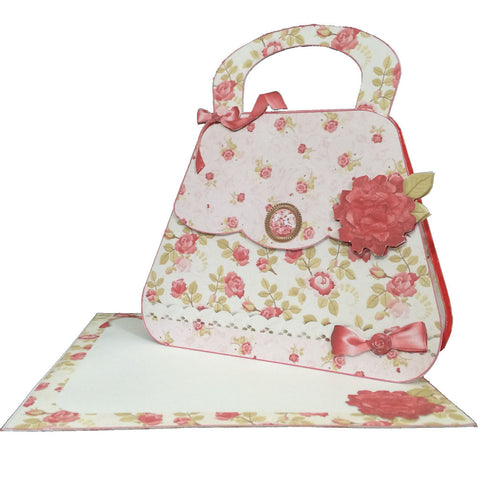
Make a Printable Vintage Rose Handbag Card
This beautiful vintage style Handbag Card is easy to make and never fails to get a good reaction! You'll find step-by-step photo instructions below as well as a video tutorial we did as a live class, and links to some of our other card making tutorials.
 Use your preferred craft supplies to do the cutting and minimise any strain on your hands e.g. I like to use a combination of a Fiskars personal trimmer, craft knife and metal ruler for straight edges and curves on cardstock, and a Gyro-Cut for shaped items on paper such as the flowers and ribbon on this card. Of course, you don't have to cut out 'all' rose and ribbon pieces if you don't want to decoupage those areas (i.e. layer up to make a 3D effect) so that makes the card mostly straightforward cutting out.
Craft Supplies Needed
- White cardstock (the thickest your printer will take)
- White printer paper
- Scissors (or craft knife/trimmer etc)
- Double-sided adhesive tape or stick-type glue
- 3D foam pads (optional, for 3D decoupage effect)
- Our Vintage Rose Handbag download
How to Make the Handbag Card
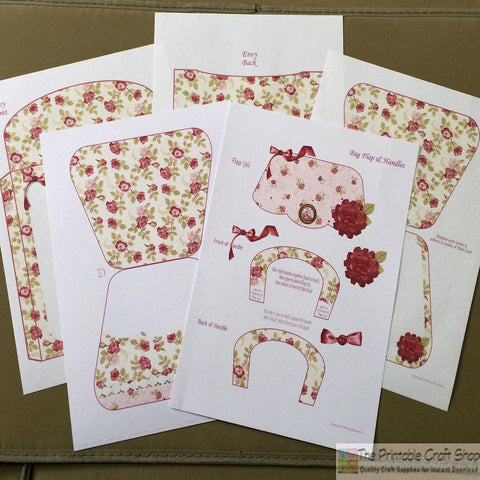
Print off all the sheets included in the download, except the full sheet of patterned backing paper as this is used to print on the reverse of some sheets.
- Print the envelope and inserts onto normal printer paper
- Main card pieces should be printed onto cardstock (we used 200gsm, recycled white).
- Optional: print the patterned backing paper onto the back of the main card (when the inserts are glued into place, they leave a few millimeters of white edging)
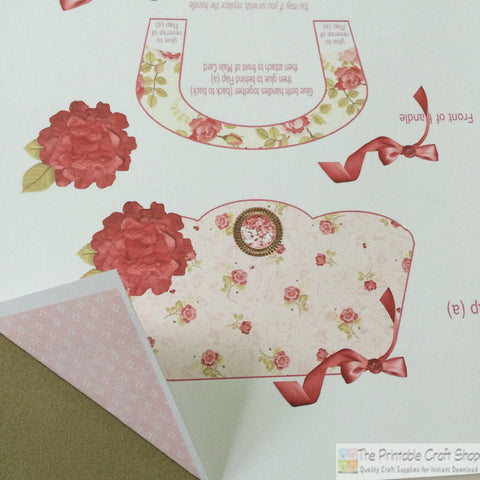
We did *not* print the paper background onto the main card to save on ink, as most of it ends up being covered by the inserts - instead we just coloured the white edge with pencil. You could use a marker, paint or leave it white.
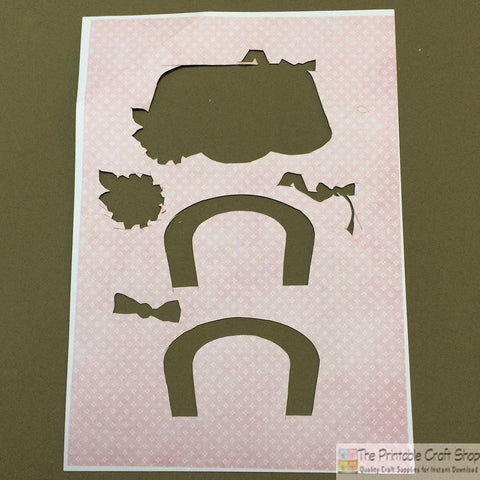
However, we did print the background paper onto the back of the elements sheet with the handles, rose and ribbon decoupage pieces - we try to avoid waste and quite a bit of that sheet is left at the end, so that way it can be re-used for something else.
Once everything is printed, cut it all out using scissors or your preferred cutting tools. Score the fold of the card and the envelope tabs (you can use the back of your scissor blade, an old ballpoint pen or the back of a butter knife if you don't have a scoring tool).
Put your double-sided tape or glue onto the back of the inserts and stick into place on the main card. Be sure to put the right place on the right part, so you don't do what we did and put the blank insert, for your greeting, on the top flap!
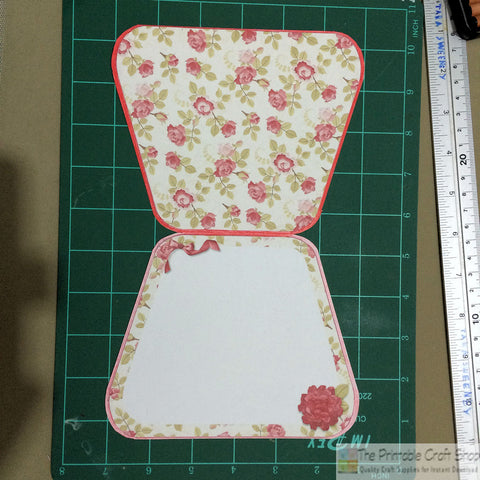
Stick the handles back to back with double-sided tape and then apply the bottom tabs to the back of the handbag flap. The whole piece then adheres to the front of the card with 3D foam pads, if using, otherwise you could achieve a raised effect by adhering small pieces of waste card to the underside of this top section, to lift the area slightly. Add your decoupaged large rose and ribbons if you are using them, also with foam pads.
That's your fab handbag card finished!

Making the Envelope
Making the envelope is really quick - apply double-sided sticky tape or glue to the tabs along the edges, that you scored earlier. Don't do anything with the envelope flap, as you need that open!
Fold in the side and bottom flaps, and put the envelope back and front together - super simple and very effective. The card fits nicely into the envelope and it finishes it all of nicely.
And finally...
If you wish, you could replace the card handles and ribbon accents with a real ribbon for a bit of extra bling.
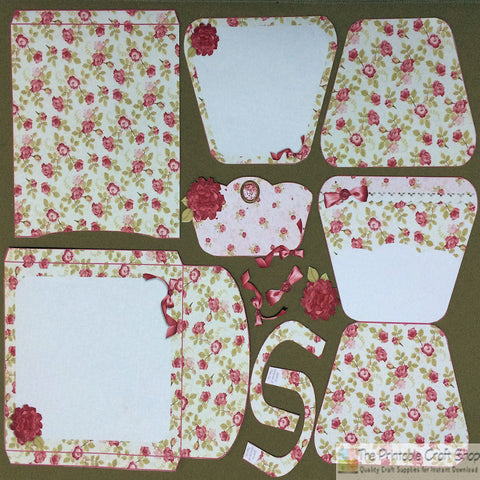
You've also got the piece(s) of waste card that you printed the background paper onto, which can be re-used for another craft project - although you can always reuse any waste white card it's even more versatile once transformed into pretty pink patterned card - see how much waste would have been left:

Buy the Vintage Rose Handbag Card Download
Browse all printable Handbag Card Kits
Full Recording of Live Class
This video shows how to make the handbag card as well as a couple of other items, including a mini pocket book using the envelopes.
Check out our other card making tutorials and videos so you can enjoy some creative me-time whenever you can; simply download, print off and start making within minutes of ordering.
Quick Printable Greeting Card Ideas
Step-by-Step Printable Card Making Tutorials
Video Card Making Tutorials for our Printables